Since their introduction by Philips in 2010, air fryers have revolutionized home cooking, becoming an essential kitchen appliance for health-conscious households.
However, when your air fryer stopped working, it can disrupt your cooking routine and leave you wondering what went wrong. From heating elements failing to blow cold air, to power supply issues causing unexpected shutdowns during cooking, these convenient appliances can face various problems.
Before considering a replacement, you should know that most air fryer issues can be resolved through proper troubleshooting. Whether your air fryer’s not heating up properly, the control panel’s unresponsive, or the basket isn’t fitting correctly, there’s usually a solution at hand.
In this guide, we’ll walk you through 10 easy ways to diagnose and fix common air fryer problems, helping you get back to convenient, healthy cooking.
Table of Contents
ToggleQuick Safety Checks First
Safety should be your first priority when troubleshooting an air fryer that stopped working. These initial checks will help prevent potential hazards while diagnosing the issue.
Unplug and Cool Down
First, disconnect your air fryer from the electrical outlet. Air fryers draw substantial current and can pose an electrical fire risk if left plugged in while malfunctioning. Allow at least 60 minutes for the appliance to cool completely, as interior temperatures can reach up to 428°F.
The exterior parts of your air fryer, particularly near the basket and vent area, can reach temperatures up to 232°F. At temperatures above 176°F, skin contact for even less than a second can cause severe burns. Therefore, handle the appliance with oven mitts or heat-proof gloves until it’s completely cool.
While waiting, ensure your air fryer has proper ventilation. Maintain at least 5 inches of space between the back of the unit and any walls or objects. This spacing prevents heat buildup and protects the power cord’s insulation from damage that could lead to fire or shock hazards.
Check for Burning Smell
If you notice a burning plastic smell, immediately stop using the appliance. While new air fryers might emit an odor during initial uses due to heat-resistant plastic components releasing fumes, an established air fryer shouldn’t produce any burning smells.
A burning odor could indicate:
- Malfunctioning fan or heating element
- Overheated components
- Dust accumulation in vents
- Electrical issues
For new air fryers experiencing plastic smell, some manufacturers recommend air frying a halved lemon to eliminate the odor. Additionally, check if your unit has entered overheat protection mode – a safety mechanism that shuts down the appliance when excessive heat is detected. In this case, ensure proper ventilation and allow 30 minutes of cooling time before restarting.
Remember, about half of appliance-related fires stem from issues with the appliances themselves. Therefore, these safety checks aren’t just precautionary – they’re essential steps in protecting your home while diagnosing air fryer problems.
Understanding Your Air Fryer
Knowing your air fryer’s components and operation helps pinpoint issues faster. Let’s explore the key aspects of your appliance to make troubleshooting more effective.
Identify Your Model
Locating your air fryer’s model number is crucial for accurate troubleshooting. Check these spots to find it:
- Bottom of the box near the barcode
- Back or bottom of the main unit on the rating label
- Front cover of your instruction manual
Locate Key Components
Your air fryer consists of six essential parts working together:
- Convection Fan: Located at the heart of your air fryer, this component circulates hot air rapidly for even cooking
- Heating Element: Positioned above the cooking chamber, it generates the heat needed for cooking
- Cooking Basket: Features a perforated design that promotes even cooking and crisping
- Temperature Control: Allows precise temperature adjustments based on recipe requirements
- Timer: Controls cooking duration to prevent overcooking
- Drip Tray: Catches excess oil and fat during cooking
Know Normal Operation Signs
Understanding normal operation helps identify potential issues:
Standard Functions:
- The display shows ‘Ready’ upon plugging in
- Function buttons (‘Air Fry,’ ‘Roast,’ ‘Bake’) appear on screen
- A whirring sound indicates the fan operation
- The machine beeps and displays ‘Add Food’ after preheating
Normal Behaviors:
- Air fryers operate like small, powerful ovens rather than deep fryers
- Food cooks faster compared to conventional ovens
- The basket requires proper insertion for operation
- Pulling out the basket temporarily pauses cooking
- The appliance might require slightly lower temperature settings than conventional recipes
Remember, air fryers use convection heating principles, circulating hot air around food through a powerful fan system. This design enables cooking with minimal oil while achieving crispy results through the Maillard reaction.
Power Supply Problems
When your air fryer fails to power up, electrical issues often lie at the root of the problem. A systematic approach to troubleshooting power-related problems can save time and prevent unnecessary repairs.
Outlet Testing Steps
Start by examining the power connection thoroughly. First, check if the power cord sits firmly in both the appliance and wall outlet. Loose connections frequently cause power interruptions. Unplug the cord, wait for several seconds, then reconnect it securely.
To verify outlet functionality:
-
Test with Another Device: Plug a simple device like a lamp into the same outlet. This confirms whether the outlet supplies power correctly.
-
Inspect the Power Cord: Look for signs of damage along the entire length of the cord. Twisted or folded sections can disrupt current flow and prevent proper operation.
-
Check Circuit Breakers: Locate your home’s electrical panel and inspect for tripped breakers. If you find one out of alignment, reset it by switching it completely off, then back on.
Power surges can trigger protective mechanisms in your air fryer. After a surge:
- Look for blown fuses in your electrical panel
- Check for signs of electrical damage
- Reset any affected circuit breakers
For persistent power issues, try these additional steps:
- Connect your air fryer to a different outlet
- Ensure the power cord maintains its shape without kinks
- Verify the plug fits snugly without wobbling
Some outlets can wear out over time, showing symptoms like:
- Increased resistance
- Loose terminals
- Undersized wiring
- Corrosion buildup
If multiple outlets on the same circuit stop working while using your air fryer, this might indicate a larger electrical issue requiring professional attention. Modern air fryers draw significant power, so ensuring your home’s electrical system can handle the load prevents future problems.
Temperature Control Issues
Temperature control problems rank among the most common air fryer malfunctions. Understanding these issues helps restore optimal cooking performance quickly.
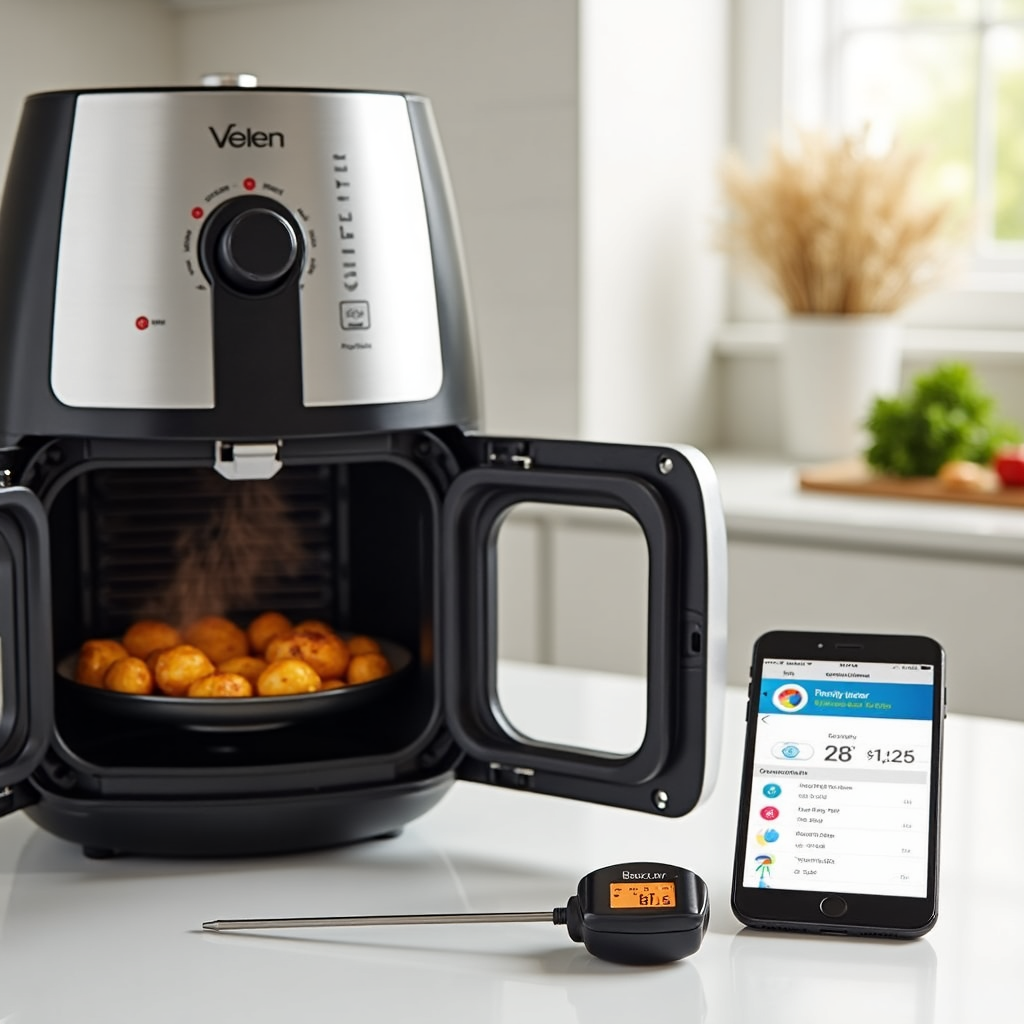
Setting Verification
Start by double-checking your temperature settings. Modern air fryers save previous temperature settings automatically. For accurate adjustments:
- Ensure the unit isn’t in standby mode
- Press the temperature key
- Adjust to desired temperature using the dial
- Confirm changes by pressing start
Heating Element Check
A faulty heating element often causes your air fryer to blow cold air instead of warming up. Look for these signs:
- No heat generation despite proper settings
- Uneven heating during cooking
- Cold spots in cooked food
For precise temperature monitoring, use a meat thermometer to verify heating element performance. This helps:
- Prevent undercooked or overcooked food
- Maintain consistent cooking temperatures
- Eliminate guesswork about food readiness
Temperature Sensor Test
The temperature sensor plays a vital role in maintaining proper cooking heat. A malfunctioning sensor might show these symptoms:
- Random temperature fluctuations
- Unexpected shutdowns
- Incorrect temperature readings
To test sensor functionality:
- Check resistance readings across sensor terminals
- Normal readings should be significantly lower than 1200 ohms at room temperature
- Higher readings often indicate sensor failure
For optimal temperature control:
- Avoid constantly adjusting heat settings
- Allow proper preheating time
- Monitor steam exposure near control panels
- Keep vents clear for proper heat distribution
Remember, different foods require specific temperature strategies. Using appropriate heat settings extends your appliance’s lifespan. Furthermore, steam accumulation near control panels can interfere with temperature regulation. Position your air fryer away from walls and obstacles to prevent heat buildup and ensure proper ventilation.
For accurate temperature monitoring, place thermometers correctly to avoid inaccurate readings. This precision helps maintain food safety standards and ensures consistent cooking results across different recipes.
Air Flow Problems
Proper airflow stands as the cornerstone of your air fryer’s functionality. A malfunctioning fan or blocked vents directly impact cooking performance, leading to unevenly cooked meals and potential safety hazards.
Fan Operation Check
The fan serves as the heart of your air fryer, ensuring even hot air circulation around food. Listen for these warning signs:
- Unusual noises during operation
- Intermittent fan operation
- Complete fan silence
Some air fryer models feature fans that cycle intermittently by design. Nevertheless, if your fan stops working entirely, examine these common causes:
- Food debris interference
- Grease accumulation on blades
- Foreign objects blocking rotation
To inspect the fan:
- Unplug the appliance completely
- Clean fan blades gently with a soft cloth
- Remove any visible obstructions
- Check for motor damage or burn marks
Vent Blockage Inspection
Clogged vents pose serious risks, including overheating and poor cooking results. A well-maintained ventilation system:
- Maintains consistent cooking temperatures
- Prevents appliance overheating
- Reduces fire hazards
Regular vent maintenance proves crucial as grease and food particles naturally accumulate over time. Signs of vent blockage include:
- Extended cooking times
- Uneven food heating
- Excessive steam buildup
- Unusual odors during operation
For optimal ventilation:
- Position your air fryer at least 5 inches from walls
- Clean vents after each use
- Remove accumulated grease regularly
- Check for proper air circulation
If cleaning doesn’t resolve airflow issues, the problem might lie with internal components. A damaged fan motor or faulty thermostat switch often requires professional repair or replacement. Moreover, prolonged continuous use can lead to overheating, potentially damaging vital components.
Remember, neglecting airflow maintenance not only decreases cooking efficiency but also creates potential safety risks. Grease buildup near vents proves highly flammable. Subsequently, maintaining proper ventilation ensures both optimal performance and safe operation of your air fryer.
Control Panel Malfunctions
Control panel issues often signal deeper problems within your air fryer’s electronic system. From unresponsive buttons to flickering displays, these malfunctions can prevent proper operation of your appliance.
Button Response Test
A systematic approach helps identify button-related problems. Begin by examining each button’s physical feedback when pressed. Unresponsive or stuck buttons might result from:
- Dust accumulation beneath buttons
- Internal contact damage
- Circuit connection issues
- Moisture exposure
To verify button functionality:
- Press each button firmly, noting any resistance
- Clean button surfaces with contact cleaner
- Check for loose internal connections
- Test button response in different cooking modes
Display Issues
Digital screen problems manifest in several ways:
- Complete display failure
- Unreadable digits
- Flickering screen
- Dim display
- Missing segments in numbers
- Appearance of minus signs
For display troubleshooting:
Initial Checks:
- Monitor screen behavior during power-up
- Observe display quality in different lighting
- Test screen visibility at various angles
- Check for loose display connections
Common Display Problems:
- LED light failure causing partial display darkness
- Damaged wiring affecting screen functionality
- Circuit board issues impacting display performance
- Touch control malfunction preventing interface interaction
For flickering displays, examine the connection between the control panel and main circuit board. Loose or damaged wires often cause intermittent display problems. Additionally, check if the indicator lights function properly, as this helps isolate whether the issue lies with the display itself or the power supply.
Professional repair might become necessary if:
- Multiple LED segments fail
- Display remains completely dark
- Touch controls become entirely unresponsive
- Screen shows persistent error messages
Remember, attempting internal repairs without proper expertise risks further damage. Consider contacting authorized repair centers for complex display issues. Regular cleaning and gentle handling of control panels help prevent many common interface problems.
Basket and Door Issues
Basket and door alignment issues frequently prevent air fryers from operating properly. These mechanical problems often trigger built-in safety mechanisms, halting operation until resolved.

Proper Alignment Check
A misaligned basket or improperly closed door activates safety switches that prevent the air fryer from starting. For thorough inspection, examine these components:
Basket Components:
- Check if the basket sits flush within the unit
- Examine the trivet fit and placement
- Look for warping or damage to basket edges
- Verify proper engagement with safety mechanisms
Heat exposure sometimes causes plastic basket edges to warp or misshapen. Additionally, manufacturing defects might result in mismatched basket components. For persistent basket fit issues, consider these solutions:
- Clean sensor contact points thoroughly
- Examine the lid position sensor for debris
- Check basket frame screws for tightness
Door Mechanism Issues: The door mechanism requires special attention as several problems can occur:
- Door springs might disengage or break
- Frame buckling prevents proper closure
- Mechanism wedging after hard closures
- Microswitch malfunction affecting door sensors
For door-related problems, inspect these areas:
- Lid and locking mechanisms for visible defects
- Safety sensors for obstruction or damage
- Door frame alignment
- Spring mechanism integrity
Some models feature door mechanisms that close forcefully, especially on uneven surfaces. This can lead to:
- Wedged connecting mechanisms
- Bent components
- Safety sensor misalignment
- Improper door engagement
Upon discovering loose components or alignment issues, tighten any visible screws, particularly those securing the basket drawer. For manufacturing defects or damaged parts, contact the manufacturer’s service department or consider exchanging the unit under warranty.
Remember, proper component alignment ensures both safety and functionality. Regular inspection of these mechanical parts prevents unexpected shutdowns and maintains optimal performance.
Error Code Solutions
Error codes often provide valuable clues about what’s causing your air fryer to malfunction. Understanding these codes helps diagnose problems quickly and determine appropriate solutions.
Common Error Codes
Different air fryer brands display specific error codes indicating various issues:
E1 Error: Typically indicates temperature sensor problems or cold storage effects. For units stored in cold places, allow 30 minutes of rest at room temperature.
E2 Error: Appears primarily in WiFi-enabled models, signaling incorrect network credentials.
E3 Error: Points to connectivity feature malfunctions, although basic cooking functions remain operational.
E4 Error: Signals door closure problems, preventing operation as a safety measure.
Quick Fixes
Most error codes resolve through simple troubleshooting steps:
-
Power Reset Protocol:
- Unplug the unit completely
- Wait 10 minutes for power discharge
- Reconnect and check if error persists
-
Display Issues: For error code “8888”:
- Clean control panel with dry cloth
- Check for stuck buttons
- Inspect for internal damage
-
Circuit Problems:
- Replace faulty circuit boards
- Contact experts for proper installation
- Avoid forceful adjustments
When to Worry
Certain situations require immediate professional attention:
Contact Support Immediately If:
- Error codes E4, E5, E6, E8, E9, or E12 appear
- Burning smells accompany error messages
- Multiple reset attempts fail
- Error persists after trying different outlets
Critical Safety Indicators:
- E10 errors during auto-cook programs
- E11 codes suggesting voltage problems
- Persistent temperature-related errors
For WiFi-enabled models experiencing E2 or E3 errors, basic cooking functions typically remain available. Nonetheless, maintaining proper documentation of error occurrences helps service technicians diagnose problems effectively.
Regular Maintenance Tips
Regular maintenance keeps your air fryer functioning optimally, preventing unexpected breakdowns. Following a structured cleaning routine ensures longevity and consistent cooking performance.
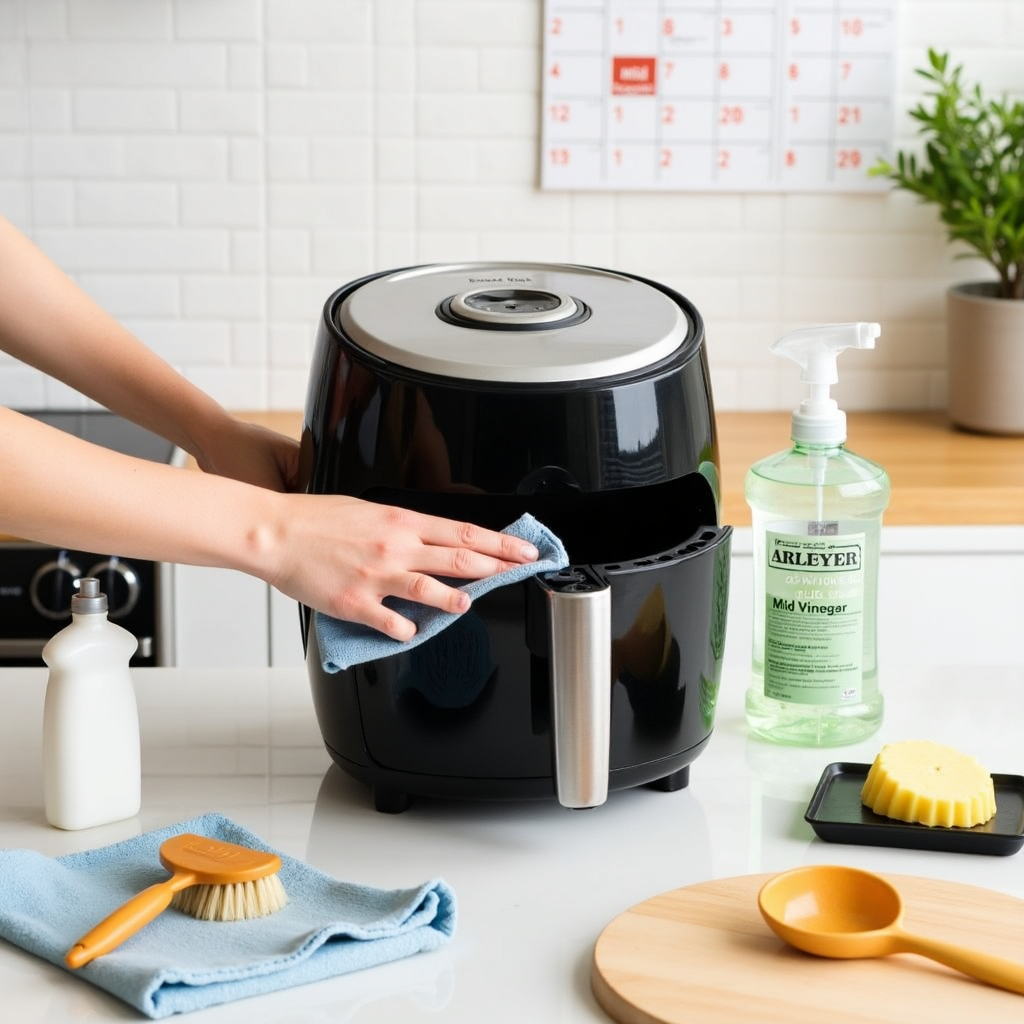
Daily Cleaning Steps
After each cooking session, perform these essential tasks:
- Turn off and unplug the appliance immediately after use
- Allow the unit to cool completely
- Remove debris between batches with paper towels
- Wipe down exterior surfaces with a damp cloth
- Clean removable parts with warm, soapy water
For optimal maintenance, consider these preventive measures:
- Use parchment paper liners to catch excess grease
- Apply light cooking oil spray to prevent food sticking
- Dry all components thoroughly before reassembly
- Clean the basket immediately to prevent hardened residue
Weekly Checks
Schedule comprehensive maintenance tasks weekly:
Component Inspection:
- Examine heating elements for grease buildup
- Check O-rings and drain pan connections
- Inspect pilot light functionality
- Test gas supply hoses for potential leaks
Deep Cleaning Protocol:
- Remove the unit from walls to clean surrounding areas
- Boil out fryer to reduce fat deposits
- Clean blower and combustion fans
- Inspect air vents for blockages
Consistent maintenance prevents common issues:
- Stubborn stains and residues
- Unpleasant odors from vent buildup
- Performance degradation over time
- Unexpected component failures
Avoid harsh cleaning agents that damage non-stick surfaces. Dawn Powerwash or similar gentle dish sprays effectively dissolve grease without harming protective coatings. Additionally, inspect the power cord regularly for signs of wear, contacting manufacturers for replacements when needed.
Remember, maintaining proper documentation of cleaning schedules helps track maintenance history. This practice aids in identifying patterns of wear and predicting potential issues before they cause complete failure.
Preventing Future Problems
Extending your air fryer’s lifespan requires mindful operation and proper care. By implementing preventive measures, you can avoid common issues that lead to malfunctions.
Usage Best Practices
Proper placement proves essential for optimal performance. Position your air fryer on a stable, heat-resistant surface with at least 5 inches of clearance from walls. This spacing ensures adequate ventilation and prevents power cord damage from excessive heat exposure.
For safe operation:
- Connect directly to wall outlets, avoiding extension cords
- Maintain proper spacing between multiple appliances
- Monitor cooking times carefully
- Avoid overcrowding the basket
Concerning oil usage, steer clear of aerosol cooking sprays containing lecithin, as these chemicals gradually break down the non-stick coating. Alternatively, use:
- Pure olive oil in spray bottles
- Balsamic vinegar
- White wine vinegar
Care Guidelines
Protect your air fryer’s components by investing in appropriate accessories. Silicone baskets fitting your model’s dimensions shield the original basket from wear. For added protection, consider:
Interior Protection:
- Use silicone baking mats for delicate foods
- Apply paper liners for high-moisture ingredients
- Employ silicone utensils exclusively
Storage Considerations: Designate a specific storage space to prevent accidental damage. Avoid storing your air fryer among other utensils where bumps and scratches might occur. Additionally, ensure the power cable remains untangled and protected from sharp objects.
For liquid-based recipes, always use appropriate inserts and silicone tools. This practice reduces wear on internal components and extends appliance longevity. Furthermore, monitor cooking durations carefully, as extended high-temperature operation may strain components.
Regular inspections help identify potential issues early. Check for:
- Loose components
- Worn power cords
- Damaged non-stick coating
- Unusual sounds or smells
By implementing these preventive measures consistently, you minimize the risk of unexpected breakdowns and ensure reliable operation throughout your air fryer’s intended lifespan.
Conclusion
Air fryer problems might seem daunting at first, though most issues have straightforward solutions. Through proper safety checks, regular maintenance, and careful attention to component care, your air fryer can serve you reliably for years.
Understanding error codes, addressing temperature control issues, and maintaining proper airflow stand essential for optimal performance. Additionally, keeping the control panel clean and ensuring correct basket alignment prevents many common malfunctions.
Remember these key practices:
- Check power connections before each use
- Clean components after cooking sessions
- Monitor temperature settings carefully
- Address error codes promptly
- Follow manufacturer guidelines
Your air fryer remains a valuable kitchen tool when maintained properly. Simple preventive measures, combined with quick problem-solving knowledge, help ensure consistent cooking results and extended appliance life.
FAQs
Q1. Why is my air fryer not turning on? If your air fryer isn’t turning on, first check if it’s properly plugged in and the outlet is working. Ensure the power cord isn’t damaged and the basket is correctly inserted. If these checks don’t solve the issue, there might be an internal electrical problem requiring professional inspection.
Q2. How can I fix uneven cooking in my air fryer? Uneven cooking often results from overcrowding the basket or improper air circulation. Try cooking smaller batches, shaking the basket midway through cooking, and ensuring there’s adequate space between food items. Also, check if the fan is working correctly and the vents aren’t blocked.
Q3. What should I do if my air fryer is emitting a burning smell? A burning smell from your air fryer could indicate overheating or accumulated food debris. Unplug the appliance immediately and let it cool. Clean the basket and interior thoroughly, removing any stuck-on food particles. If the smell persists after cleaning, it may signal an electrical issue requiring professional attention.
Q4. How often should I clean my air fryer? For optimal performance and hygiene, clean your air fryer after each use. Wipe down the exterior, wash the removable parts with warm soapy water, and clean the interior with a damp cloth. Perform a more thorough cleaning weekly, including inspecting and cleaning the heating element and fan.
Q5. Why is my air fryer’s display showing error codes? Error codes on your air fryer’s display typically indicate specific issues. Common codes like E1 might signal temperature sensor problems, while E4 could indicate door closure issues. Consult your user manual for code meanings and try resetting the appliance. If errors persist, contact the manufacturer’s support for guidance.
Start editing
Article Writer 6 | Writesonic
