Did you know that our guide on how to clean Ninja air fryer has been viewed nearly 96,000 times? That’s because keeping these kitchen workhorses spotless is a common challenge for many of us.
Fortunately, cleaning your Ninja air fryer doesn’t have to be a dreaded chore. In fact, the entire process takes under 30 minutes, making it a quick task you can easily fit into your routine. We’ve found that the best way to maintain your air fryer is by cleaning the basket and tray after each use to prevent grease buildup. Additionally, a simple baking soda paste can effectively remove stubborn residue when left on for about 20 minutes before scrubbing.
In this guide, we’ll walk you through a step-by-step Ninja air fryer cleaning process that actually works. From safely handling the main unit (which should never be submerged in water) to properly caring for dishwasher-safe parts, we’ve got you covered with practical tips to keep your appliance running efficiently for years to come.
How to clean ninja air fryer ?
some several ways where you can easily clean your ninja air fryer :
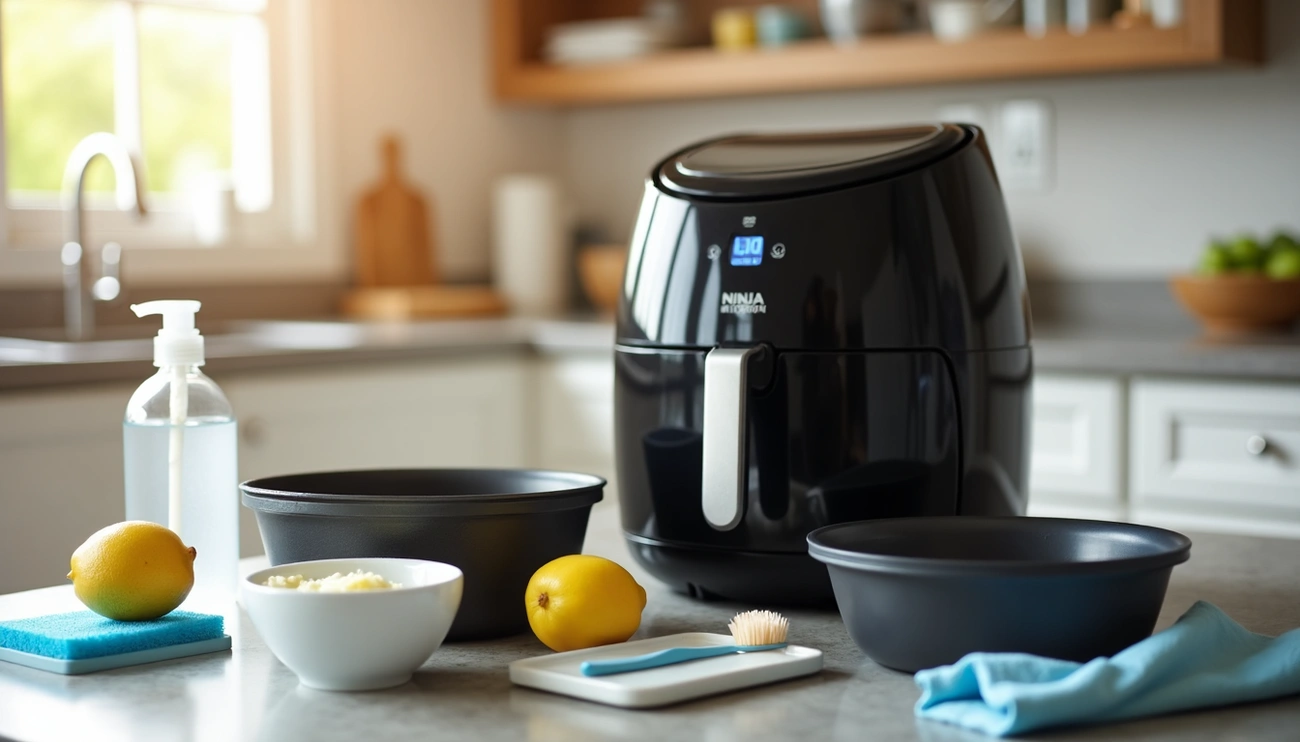
Get Ready to Clean Safely

Image Source: Homes and Gardens
First and foremost, proper cleaning of your Ninja air fryer requires some safety preparations. Paying attention to these initial steps ensures both your safety and the longevity of your appliance.
Unplug and let the air fryer cool
Safety should always be your priority whenever I clean my Ninja air fryer. The first step is to unplug the appliance from the wall outlet. This simple action prevents potential electrical hazards while handling water or cleaning solutions.
The cooling process is equally important. After removing your food, the air fryer basket and crisper plate will be hot. Let the unit cool completely before attempting to clean it. This cooling period typically takes about 30 minutes.
However, don’t wait too long after cooling. Finding the right timing is crucial:
- Wait until the unit is cool to the touch
- Clean within 30 minutes of cooling
- Avoid waiting for hours
Why this timing matters: letting the air fryer sit for too long will harden grease and food drippings, making them stubbornly stick to the insides and consequently harder to remove. For immediate cleaning of very hot parts, I sometimes carefully remove the basket with the crisper plate and run them under cold water to cool them down more quickly.
Notably, some Ninja air fryers draw significant electrical current. To minimize fire risks, it’s best to give your air fryer its own outlet while in use and unplug it after each use.
Check your model’s manual for cleaning instructions
Different Ninja air fryer models have specific cleaning requirements. Subsequently, I always refer to my user manual for the exact cleaning instructions for my particular model.
The manual provides essential information, such as:
- Which parts are dishwasher-safe
- Recommended cleaning methods for each component
- Specific warnings or precautions
For instance, while most Ninja air fryer baskets and crisper plates are dishwasher safe, the main unit should never be cleaned in the dishwasher or submerged in water. Meanwhile, some models have ceramic-coated, PTFE/PFOA-free, and nonstick components that require gentle cleaning with soft sponges to prevent scratching.
Primarily, the cleaning and maintenance section in your Ninja Air Fryer Owner’s Guide will provide the most reliable information for your specific model.
Clean the Removable Parts First

Image Source: Amazon.com
Once your Ninja air fryer has properly cooled, it’s time to focus on the removable components. Starting with these parts makes the cleaning process more efficient and thorough.
Take out the basket, tray, and accessories
First, carefully remove all removable components from your air fryer. This typically includes the cooking basket, crisper plate or tray, and any additional accessories like racks. For those with a Ninja air fryer oven, don’t forget to slide out the metal crumb tray at the bottom. If you own a Ninja Foodi model that doubles as a pressure cooker, remember to pull off the silicone ring from around the inside of the lid as food particles and odors can get trapped there.
Use dishwasher if safe, or hand wash with soapy water
Next, check your specific model’s manual to determine which parts are dishwasher-safe. Most Ninja air fryer baskets, crisper plates, and accessories can go in the dishwasher. Furthermore, if using a dishwasher, place these items on the top shelf for gentler cleaning.
Nevertheless, Ninja specifically recommends hand washing these components to extend their lifespan. This is particularly important for baskets with nonstick ceramic coating, as frequent dishwasher use can gradually wear down this surface. For hand washing, use warm water with mild dish soap and a non-abrasive sponge or soft cloth to protect the nonstick coating.
Soak in warm water for stuck-on grease
For stubborn food residue or grease that won’t budge with regular washing, soaking is your best solution. Fill your sink with warm, soapy water and submerge the affected parts for 10-15 minutes to loosen stuck-on food particles. Particularly challenging spots might require 20 minutes of soaking time.
As a result of proper soaking, even tenacious food residue should lift away more easily when scrubbed with a soft-bristled brush or non-abrasive sponge. Therefore, avoid using harsh chemicals or abrasive cleaners which could damage the coating.
After cleaning, thoroughly dry all components before reassembling them in your air fryer.
Tackle the Main Unit and Heating Element

After tackling the removable parts, it’s time to focus on the main unit and heating element of your Ninja air fryer. This component requires special attention since it contains electrical elements that can be damaged by improper cleaning.
Wipe the interior with a damp sponge
The interior surfaces of your Ninja air fryer need gentle yet thorough cleaning. I typically start by wetting a non-abrasive sponge with hot water from the tap and wiping down all inside surfaces. If food residue persists, I add a few drops of mild dish soap to the sponge and gently scrub the interior. Afterward, I follow up with a clean, damp cloth to remove any soap residue.
To prevent buildup, try cleaning the inside after each use or at least every other use. This regular maintenance makes the job much easier in the long run. Importantly, avoid using abrasive scrubbers or harsh chemical cleaners as they can damage the non-stick surfaces and potentially contaminate your food during the next use.
Scrub the heating element with a soft brush
The heating element—typically a metal coil with a fan located at the top of your air fryer or attached to the lid—requires special cleaning attention. When the element is completely cool, I use a soft-bristled cleaning brush (an old toothbrush works perfectly) dampened with hot soapy water to gently remove grease and food residue from the coil.
Work the bristles carefully around the entire heating element until all visible residue is gone. Finally, wipe it with a damp cloth to remove soap. Remember that any metal grate or cover over the heating element should remain attached during cleaning—removing it could void your warranty.
Avoid submerging the main unit in water
Above all, never immerse the main unit of your Ninja air fryer in water or any other liquid. Moreover, the main unit should never be cleaned in a dishwasher. Instead, simply wipe the main unit and control panel with a slightly damp cloth.
For stubborn grease stains on the main unit, you can create a paste with water and baking soda. Apply this to tough spots, work it in gently with a soft brush, then wipe clean with a damp cloth.
Deep Clean Tough Grease and Odors

Even with regular cleaning, tough grease and persistent odors can still build up in your Ninja air fryer over time. Thankfully, several deep cleaning methods can tackle these stubborn issues and restore your appliance to like-new condition.
Use baking soda paste for stubborn spots
For those especially resistant greasy spots, baking soda works wonders as a gentle yet effective cleaner. I create a simple paste by mixing equal parts baking soda and water in a small bowl. This natural solution works effectively without harsh chemicals that might damage the air fryer’s surfaces.
To apply this method:
- Spread the paste directly onto stubborn grease spots
- Let it sit for about 20 minutes to break down the grease
- Gently scrub with a soft-bristled brush
- Wipe clean with a damp cloth
For extra cleaning power, try substituting water with liquid dish soap in your baking soda paste. Alternatively, spray distilled white vinegar onto the greasy areas first, then sprinkle baking soda directly on top – the resulting bubbling reaction helps lift stubborn grease naturally.
Try lemon juice steam for the lid
Persistent odors from cooking fish or other strong-smelling foods can linger in your Ninja air fryer. Lemon juice steam provides an excellent solution that eliminates odors while simultaneously loosening grease on the lid.
To implement this technique, add approximately 1 cup of hot water and 1 cup of lemon juice to the air fryer basket. Close the lid and allow it to sit for 5-10 minutes, creating steam that penetrates and deodorizes. Afterward, I dip a sponge in this lemon solution and wipe down the interior of the lid.
An alternative method combines 1 ounce lemon juice, 1 ounce white vinegar, and 2 ounces water in a small ceramic ramekin. Place this mixture in the air fryer basket and run at 400°F for 5 minutes to create odor-eliminating steam.
Boil soapy water inside if model allows
Some Ninja air fryer models, primarily the pressure cooker varieties like the Foodi, can handle boiling liquids for deep cleaning. Before attempting this method, always check your specific model’s manual to ensure it’s liquid-safe.
To use this technique, fill the bottom of your air fryer basket with warm water and add a few drops of dish soap. Slide the basket back into the unit and run it at the lowest temperature setting for approximately 5 minutes until the water boils. After turning off the unit and allowing it to cool, wipe the interior with a clean cloth – grease and grime should lift away much more easily.
This steam-cleaning approach works particularly well for removing caked-on grease that regular cleaning methods can’t tackle.
Conclusion
Keep Your Ninja Air Fryer Running at Its Best
Maintaining a clean Ninja air fryer certainly doesn’t have to be a dreaded chore. Throughout this guide, we’ve covered everything from basic safety precautions to deep cleaning techniques for stubborn grease. Most importantly, regular cleaning after each use prevents buildup and makes maintenance significantly easier in the long run.
Additionally, knowing which parts can go in the dishwasher and which require hand washing ensures you’ll protect your air fryer’s surfaces while keeping them spotless. Meanwhile, natural cleaning solutions like baking soda paste and lemon juice steam offer effective alternatives to harsh chemicals that might damage your appliance.
Remember that the entire cleaning process takes less than 30 minutes – a small investment that yields big returns in appliance longevity and food quality. Consequently, your Ninja air fryer will continue performing efficiently meal after meal, year after year.
Overall, a well-maintained air fryer not only looks better but also cooks more effectively without unwanted odors or smoke from previous meals. Therefore, I recommend establishing a quick cleaning routine after each use rather than allowing grease to accumulate. By following these simple yet effective cleaning techniques, you’ll ensure your Ninja air fryer remains a reliable kitchen workhorse for many delicious meals to come.
FAQs
Q1. How often should I clean my Ninja air fryer? It’s best to clean your Ninja air fryer after each use to prevent grease buildup. A quick wipe-down after cooking can make regular maintenance much easier and keep your appliance in top condition.
Q2. Can I put the removable parts of my Ninja air fryer in the dishwasher? While many Ninja air fryer parts are dishwasher-safe, it’s recommended to hand wash them to extend their lifespan, especially for components with nonstick coating. Always check your specific model’s manual for guidance.
Q3. How do I clean stubborn grease from my Ninja air fryer? For tough grease, create a paste using equal parts baking soda and water. Apply this to stubborn spots, let it sit for about 20 minutes, then gently scrub with a soft-bristled brush before wiping clean with a damp cloth.
Q4. Is it safe to clean the heating element of my Ninja air fryer? Yes, you can clean the heating element, but do so carefully. Use a soft-bristled brush or damp cloth to gently remove any grease or food debris when the element is completely cool. Avoid getting it too wet and never use abrasive materials.
Q5. How can I remove lingering odors from my Ninja air fryer? To eliminate persistent odors, try a lemon juice steam cleaning method. Add a mixture of hot water and lemon juice to the air fryer basket, close the lid, and let it sit for 5-10 minutes. This will help deodorize and loosen grease simultaneously.