Reheating chicken to achieve that perfect balance of juiciness and crispiness can be a challenge, often leaving you with dry or unevenly warmed meals. Fortunately, the air fryer emerges as a game-changer in the kitchen, promising to restore the delectable flavors and textures of your chicken dishes with minimal fuss.
If you’ve ever found yourself pondering over “how long to warm up chicken in air fryer?” – you’re in for a treat. Read on to discover the optimal timing and techniques to revive your leftovers to their former glory and turn them into a scrumptious experience once more.
Table Of Content
How Long to Warm Up Chicken in Air Fryer? Guilt Free Method
Warming up chicken in an air fryer is quick and simple. You don’t need to worry about drying it out or spending too much time in the kitchen. With just a little bit of know-how, you can enjoy juicy and flavorful chicken that tastes like it’s fresh from the oven. Let’s find out the best way to do it without losing any of that yummy taste.
Optimal Air Fryer Settings for Reheating Chicken
Achieving the perfect reheated chicken in your air fryer is all about finding the right settings. Start by preheating your air fryer to 350°F, which is the sweet spot for warming without cooking it further. Place your chicken inside and set the timer for about 3 to 4 minutes. If you’re dealing with a thicker cut, give it a minute or two more. Check the chicken to make sure it’s warmed through and enjoy the tender, juicy flavors that taste just like it’s made fresh. Remember, air fryer models can vary, so it’s always good to start with less time and add more as needed.
Common Mistakes to Avoid When Warming Chicken in an Air Fryer
Not all chicken reheat sessions turn out perfect, and there are a few common slip-ups to steer clear of:
- Skipping the Preheat: Make sure to preheat the air fryer before placing your chicken in it. This helps to ensure even warming.
- Overcrowding: Don’t crowd the basket. Leave some space between pieces of chicken for the air to circulate properly.
- Neglecting to Flip: Halfway through the warming time, flip the chicken over so that both sides get that nice, even heat.
- Ignoring Thickness: Thin slices need less time while thicker cuts might need a bit longer. Be mindful of size differences.
- Forgoing the Use of Water: For extra juiciness, add a teaspoon of water to the bottom of the air fryer before cooking. It creates steam and helps to keep the chicken moist.
- Overheating: Keep a close eye on time; heating it too long can turn your chicken dry and chewy.
- Failing to Test for Doneness: Use a meat thermometer to be sure it hits the safe temperature of at least 165°F.
Seasoning and Flavor Boosts for Reheating Chicken in the Air Fryer
When you warm up chicken in the air fryer, you also have a chance to add some extra taste. Sprinkle on some of your favorite spices like garlic powder, paprika, or a bit of salt and pepper before you start to heat it. You can also brush your chicken with a little bit of olive oil or your favorite sauce to make it even tastier. This step can help keep the chicken moist and give it a fresh flavor that makes it feel like it’s not just leftover chicken. Remember, just a little bit can go a long way in adding that extra kick of flavor!
Achieving Perfectly Crispy Reheated Chicken in the Air Fryer
To get that perfect crispiness on your reheated chicken using an air fryer, start by setting your air fryer to 400°F to make the skin super crispy. Lay the chicken pieces in a single layer in the basket without overcrowding, which allows the hot air to circulate freely. Then, reheat for about 4-6 minutes, depending on the size of the pieces. For an added touch of crisp, lightly spray the chicken with oil before heating. Make sure to flip the chicken halfway through to crisp up both sides evenly. Check the chicken’s temperature with a meat thermometer to ensure it’s heated through to at least 165°F. Enjoy your deliciously crispy chicken that’s just like freshly cooked!
Step-by-Step Guide: How Long to Warm Up Chicken in Air Fryer?
For those wondering “how long to warm up chicken in air fryer?”, here is a step-by-step guide to help you reheat your chicken perfectly every time.
Step 1: Preheat Your Air Fryer
Before you begin, ensure that your air fryer is preheated to 350°F. This is crucial for even reheating, as starting with a cold air fryer could lead to unevenly warm chicken.
Step 2: Prepare Your Chicken
While the air fryer is preheating, prepare the chicken by arranging it in a single layer in the air fryer basket. If the chicken has been stored in the fridge, let it sit at room temperature for a few minutes to take off the chill. This ensures more uniform heating.
Step 3: Add Moisture (Optional)
If you want to maintain the juiciness of the chicken, consider adding a teaspoon of water to the bottom of the air fryer or lightly brushing the chicken with oil. This helps to prevent drying out during the reheating process.
Step 4: Season for Extra Flavor
Sprinkle your chicken with any additional seasonings you prefer for extra flavor. A pinch of garlic powder, paprika, or simply salt and pepper can enhance the taste.
Step 5: Place Chicken in Air Fryer
Put the chicken in the preheated air fryer. Make sure that the pieces are not touching each other to allow for proper air circulation.
Step 6: Start Reheating
Set the timer for 3 to 4 minutes. If your chicken is thicker or bone-in, you may need to add an additional 1-2 minutes. Be mindful not to overcook.
Step 7: Flip Halfway Through
Halfway through the warming time, open the air fryer and flip each piece of chicken. This will help the chicken to heat all the way through evenly.
Step 8: Check for Doneness
After the time is up, use a meat thermometer to check if your chicken has reached an internal temperature of 165°F. If it hasn’t, give it another minute or so, but be cautious to avoid overheating.
Step 9: Rest Before Serving
Once your chicken has reached the correct temperature, let it rest for a few moments before serving. This allows the juices to redistribute, keeping the meat tender and flavorful.
Enjoy your perfectly warmed chicken that should taste as good as when it was first cooked!
Tips for Reheating Sides in the Air Fryer: A Step-by-Step Guide
Reheating side dishes in the air fryer can be just as easy and effective as warming up chicken. Follow these simple steps to bring back the delicious taste and texture of your favorite sides.
Step 1: Preheat the Air Fryer
Start by preheating your air fryer to 350°F. This temperature works well for most side dishes, ensuring they warm up thoroughly without becoming too crispy or burnt.
Step 2: Arrange the Sides
Place your sides in the air fryer basket in a single layer to promote even heating. Allow space between the items to let the air flow freely. If the sides are cold from the fridge, let them sit out for a few minutes to reach room temperature first.
Step 3: Use Parchment Liners (Optional)
For sides that might stick to the basket or have a sauce, consider using air fryer parchment liners. They can make cleanup easier and prevent sticking.
Step 4: Light Seasoning (Optional)
Feel free to sprinkle a little seasoning on your sides if desired. This can help refresh the flavors, making them taste freshly made.
Step 5: Time to Heat
Close the air fryer and set the timer. Most sides will reheat quickly, often in about 3 to 5 minutes. Watch the time closely to avoid overcooking, especially for delicate items like vegetables.
Step 6: Shake or Turn
Halfway through reheating, shake the basket or turn the sides over. This step is crucial for ensuring that the heat reaches every part of the side dish evenly.
Step 7: Test for Warmth
After the timer goes off, check if the sides are warmed to your liking. If not, you can add an extra minute, but be careful not to dry them out.
Step 8: Let Them Stand
Once heated through, let your side dishes stand for a minute before serving. This helps any hot spots to even out, ensuring a pleasing temperature throughout.
Now, savor your scrumptious sides, revived to their original glory, ready to accompany your main dish flawlessly!
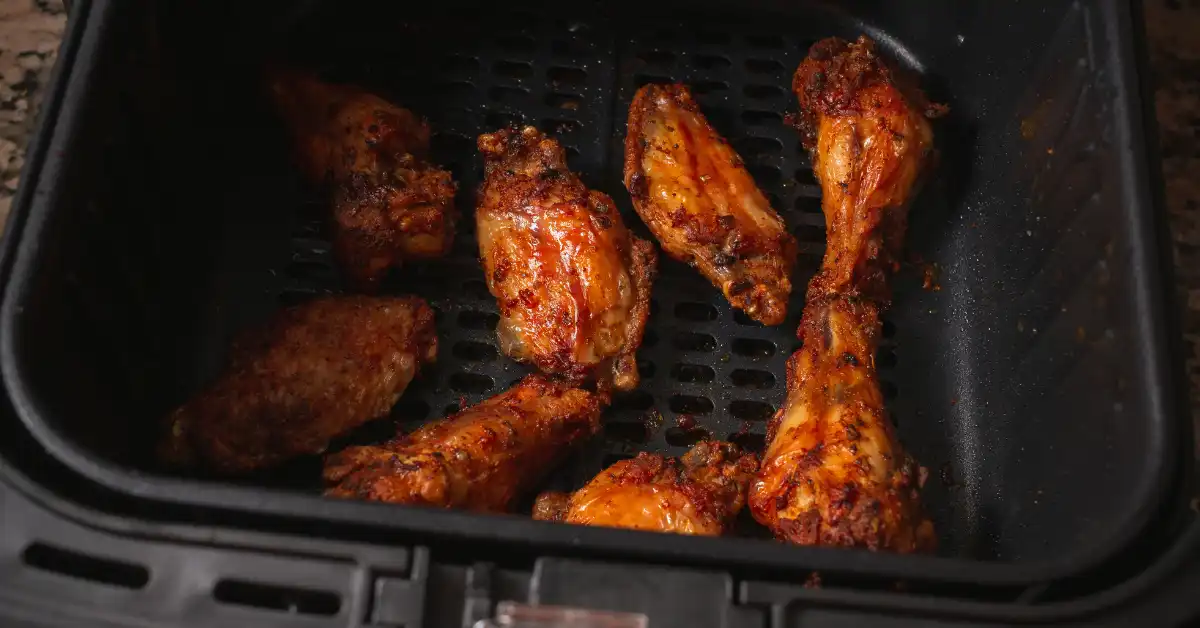
Easy Guide to Reheating Chicken Wings in an Air Fryer
If you’ve got leftover chicken wings and you want them to taste as good as when they were first made, using your air fryer is the way to go! Here’s how you can warm them up quickly:
- Get the Air Fryer Ready: Turn on your air fryer and heat it to 360°F.
- Prepare the Wings: Put the wings in the basket in one layer so the hot air can get to all sides.
- Warm Them Up: Cook them for about 5 to 6 minutes. If your wings are really big, they might need an extra minute.
- Check Them: After the time is up, make sure they’re nice and warm. You want the inside of the wing to be 165°F.
- Enjoy: Take them out and let them sit for a moment. Now, they’re ready to eat!
Reheating Chicken Thighs in the Air Fryer: A Simple Method
To warm up chicken thighs so they taste just like new, follow these easy steps:
- Warm the Air Fryer Up: Turn your air fryer to 400°F to get it ready.
- Prepare the Chicken Thighs: Place the thighs inside the basket, not touching, for even cooking.
- Reheat: Heat them for about 7 minutes. If the thighs are big or have bones, they might need more time.
- Flip Them Over: Don’t forget to flip the thighs halfway through to warm them up all over.
- Check Temperature: Use a food thermometer to make sure they’re heated to 165°F on the inside.
- Time to Eat: Let them cool for a short time, then they are all set to serve and enjoy!
Reheating Chicken Breasts in the Air Fryer: Quick & Easy
Want to make your leftover chicken breasts taste like you just cooked them? The air fryer is the perfect tool for the job. Check out these simple steps:
- Preheat the Air Fryer: Crank up your air fryer to 350°F to get things started.
- Arrange the Chicken: Pop the chicken breasts in the basket. Leave a little room around each piece so the hot air can move.
- Heat ‘Em Up: Let them warm for about 3 to 4 minutes. If they are really thick, they may need a couple more minutes.
- Turn Them Over: Flip them halfway through the cook time to make sure they heat up evenly.
- Check the Temp: After heating, grab your food thermometer. Make sure they’ve hit 165°F inside.
- Rest and Serve: Let them sit for a short while, then they’re good to go. Enjoy your tasty, juicy chicken breasts!
Quick and Easy Air Fryer Reheated Chicken Tenders
Reheating your chicken tenders so they’re as good as new is a breeze with an air fryer. Here’s your easy guide:
- Heat up Your Air Fryer: Set the temperature to 375°F to start warming up your air fryer.
- Ready the Chicken Tenders: Pop your chicken tenders in the basket but don’t crowd them. You want the hot air to get around each one.
- Reheat Your Tenders: Let them heat for about 3 to 4 minutes. If they’re on the chunky side, give them an extra minute.
- Flip Time: Turn them over halfway through to make sure they warm up nice and even.
- Temperature Check: When the time’s up, check if they’ve reached 165°F inside with a food thermometer.
- All Set to Eat: Let them settle for a minute, then it’s time to dig in. Enjoy your tender and juicy chicken tenders!
Easy Reheat Instructions for Rotisserie Chicken in an Air Fryer
Bringing back the fresh taste of rotisserie chicken is simple with your air fryer. Just follow these steps to enjoy juicy and warm chicken in no time:
- Preheat Your Air Fryer: Set your air fryer to 350°F to get it nice and hot.
- Prepare Your Chicken: Cut the rotisserie chicken into pieces that will fit in the basket. This helps it heat evenly.
- Place Chicken in Basket: Arrange the chicken in a single layer for maximum airflow.
- Start Reheating: Let the chicken reheat for about 4 minutes, then check how it’s doing. Depending on the size, you might need a couple more minutes.
- Check the Heat: Make sure each piece of chicken is at least 165°F inside using a meat thermometer.
- Rest and Enjoy: Give it a minute to cool down, then your rotisserie chicken is ready to be savored as if it’s just off the spit!
Storing Leftover Air Fried Chicken Properly
Keeping your leftover air fried chicken tasty for later is super easy! Just follow these steps:
- Cool It Down: Wait until your chicken is room temperature. Hot chicken can make steam in the container, and that’s not good.
- Pick the Right Container: Use an airtight container or a zip-top bag to keep your chicken fresh.
- Seal and Label: Make sure the container is sealed tight. You can write the date on it too, so you remember when you cooked it.
- Fridge or Freezer: If you’re going to eat the chicken in the next few days, put it in the fridge. If you want to save it for longer, like a few weeks, you can freeze it.
- Reheat When Hungry: When it’s time to eat, just reheat it in the air fryer following the steps above to make it crispy again.
That’s it! Now your chicken will stay good and you can enjoy it another day!
Conclusion:
Well, there you have it folks, the lowdown on getting your chicken back to its glory days with none other than your trusty air fryer! Warming up your wings, thighs, breast, tenders, or that scrumptious rotisserie masterpiece is a snap. The biggest question “How Long to Warm Up Chicken in Air Fryer?” has a pretty simple answer: not long at all! Just a few minutes and voilà, your taste buds are in for a treat.
Forget about soggy microwaved chicken disasters and hello to that perfect crispiness that only an air fryer can bring back to the table, literally! Just remember the golden rule: 165°F is the magic number—that’s when you know it’s time to tuck in. So next time you’re staring at those sad chicken leftovers, give them a quick air fryer spa treatment. They’ll come out feeling like new, ready for their encore on your plate!